Friday, November 21, 2014

New Rear Turn Signals

I received a pair of turn signals from my coworker and fellow TW owner. I decided to install them in the rear to replace the fugly and dated factory monsters. While a super small mod, it is a much needed improvement over what was there.


Monday, November 17, 2014

TWM v2.00

Wow, 18 months since an update.  That.  Is.  Pathetic.  But in that period of time, I lost the engine in my Saab 92x, swapped in a JDM EJ207 STi engine, and tuned it for our 91 octane at 18 lbs of boost, which took about five months of solid effort to complete solo...

The EJ207 just after its first start-up photo IMG_4933.jpg

... my wife and I had our first child, who is absolutely amazing, but also very time consuming...

 photo IMG_0488.jpg

... and I acquired two new motos.  In fact, that last detail affects the direction of this project dramatically.

The first moto is a near mint 1974 Suzuki TS125 with 3,476 original miles.  It was my wife's grandfather's who passed it down to her father who eventually passed it down to us.  It has all the charm that an underpowered 70s 2-stroke should have, and my wife is thrilled to have it - a response I did not expect.

 photo IMG_5086.jpg

The second moto is a 1994 Yamaha TW200 I purchased with 4,759 miles.  This oddly proportioned moto is one that has intrigued me ever since I rode one for two days during my MSF motorcycle endorsement.  What it lacks in power and excitement, it more than makes up for in character.  In fact, of the motos I have owned and spent real time on, my little T-Dub has earned the coveted title of "favorite."  The last few hundred miles of commuting and dirt road exploring have been so pleasant, the DR350 - the original Tiny War Machine - has dropped out of my mind completely.  So this marks the birth of Tiny War Machine v2.00 (TWM2) - very fitting name given the bike's model name.  The TWM title has been passed from the mighty DR to the mild T-Dub, but it is a change that brings optimism for project progress, even if it is a completely new path.

 photo IMG_5098.jpg

I have learned [from experience] that it is a lot easier to maintain excitement about something that runs than something that does not.  I was pretty unexcited about having a Saabaru without an engine for five months, but am thrilled to have the hyper little grocery getter it is now.  My excitement for the DR350, well, I think my lack of real updates and progress over the last 18 months speaks for that.  Additionally, part availability, part cost, and off-the-shelf modification options are magnitudes better for the T-Dub than the DR, especially for such a niche-moto.  It does not feel overwhelming to envision a completely customized T-Dub.  Store-bought mild to fabricated wild, I can choose the level of customization I want to go without committing to complete fabrication, unlike the DR.  That is very appealing when I start dreaming up project path options.

So what is the project path?  I am not sure I want to commit to one just yet and may never.  An error I made with the DR was telling myself it was going to be a bike like "xyz."  With the T-Dub, I think I'm just going to start doing stuff and see where it goes.  The goal here will be to always return TWM2 to a rideable form after every modification; to never take such a large leap that I have a basket case instead of a running bike.  Maybe that strategy will yield more success than the original TWM.  We will see.

Tuesday, April 2, 2013

Engine Setbacks

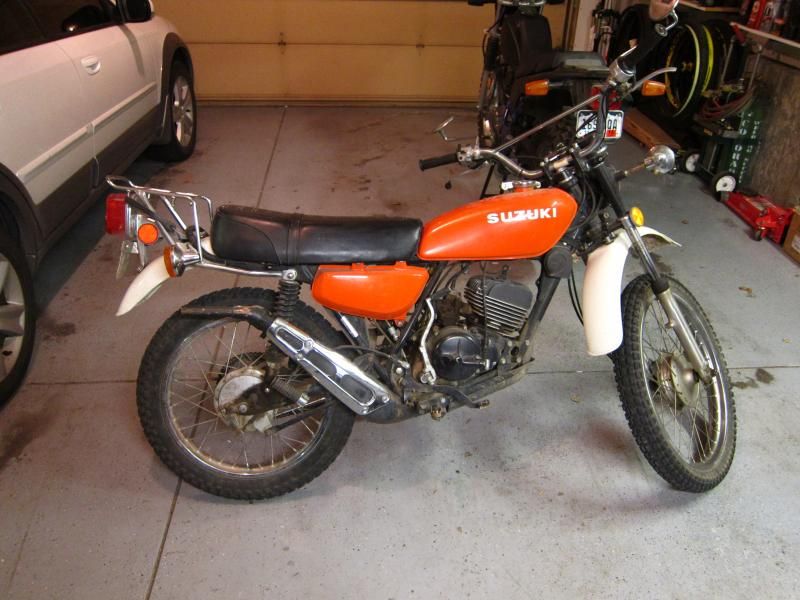
After acquiring both dirt bikes, my plan was to use the case and engine internals from #1, the cylinder from #2, and the head from #2.  I knew #1 had been starved of oil, but the engine appeared to be in really good condition; better than #2's.  Remember, #2's had a 2" deep oil/dirt/grime sludge pool in the bottom of the case after living exposed outdoors.  However, after this weekend, it seems everything will be sourced from #2.

I began removing parts from #1's engine with the goal of having it out of the frame and on the bench by the end of the weekend.  The first part to be removed was the old piston since I wanted the connecting rod hidden from danger down in the case while I wiggled the case out.  So I go to remove the wrist pin clips but there are none, they have already been removed.  I push on the wrist pin with my finger, but it doesn't budge.  I grab the piston with my other hand to rock it back and forth while pushing on the wrist pin, but it doesn't rotate, it doesn't even move.  The piston is completely fused in place with connecting rod.  And that's when it hit me; when this engine ran out of oil, it wasn't just the head, piston, and cylinder that were punished by overwhelming friction, the internals were too.  The same internals I intended to use for my running engine.  Fail.


So the new plan is to use #2's internals and case with #1's stator cover (#2's is damaged).  Unfortunately, this means I will be splitting the case, not to replace parts, but to clean everything of gritty goo.  This also means I will be making that specialty tools purchase I was hoping to avoid.


To take my mind off the case and to make some progress, I went to work on the broken exhaust studs in #2's head.  I have been soaking them in PB Blaster twice a week for two months.  Those studs should come out with a Fischer Price screwdriver by now, right?  Not the case.  Not only did my left-hand drill bit not grab the bolt and break it loose with a satisfying "pop" that I expected hoped to hear, it didn't bore 1/32" deeper into the stud. So much for using an Easy-Out at this point.


A trip to work and a talk with one of the machinists who has taken special interest in this project yielded a solid carbide drill bit. After an hour of patiently making small chips, I have two 1/4" diameter, 1/2" deep holes where broken studs used to be.  Success.

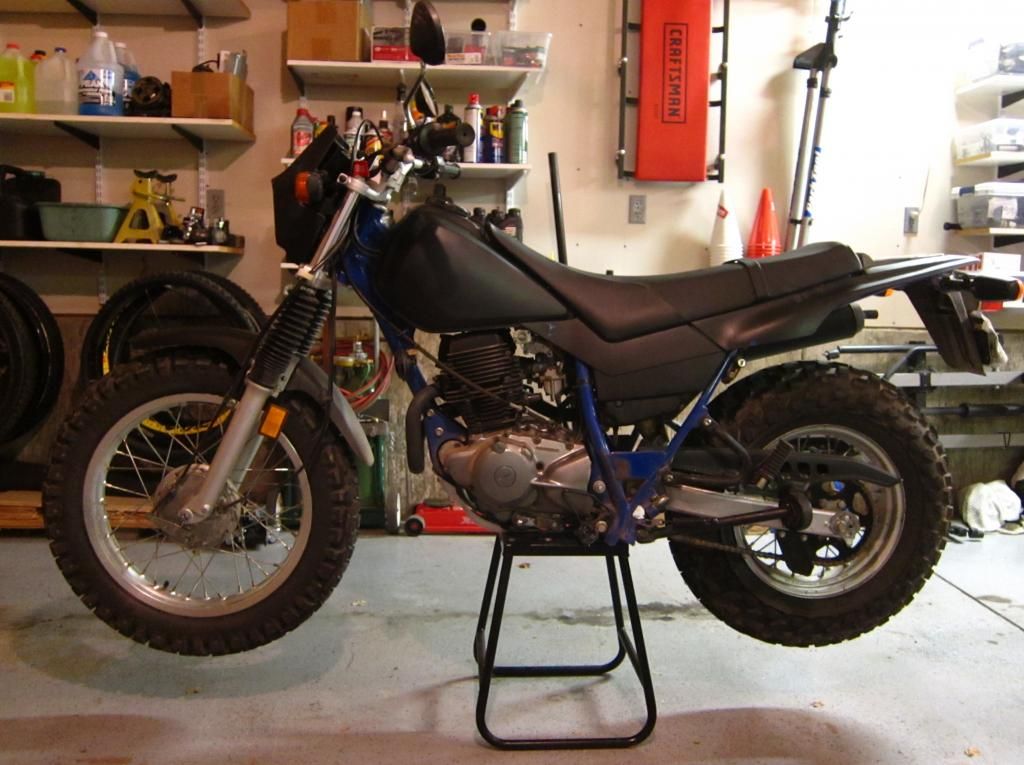
(Before the second stud was bored)

In goes the new Easy Out, and out comes... and Easy Out with chipped ribs and no stud carcasses.  Fail, again.


So the new plan is to somehow fixture the head, overbore the stud holes, and Heli-Coil new M8 threads.  That's the plan anyway.

Thursday, March 21, 2013

At last, something to report

It's been awhile since I have had something to post; longer than I like, actually. There were some delays getting the necessary parts in and modified, but they are finally here. The cylinder is back from American Bike Tailor where it was bored 1mm over and media blasted. The 80mm Wiseco forged 10.5:1 piston (PN 4576M08000) had to arrive before the overbore could be performed. And then the timing chain guides, gaskets, and other miscellaneous items were all sourced from different distributors. Coordination fail on my part.

Piston and media blasted cylinder sitting pretty.

The cylinder after three coats of Dupli-Color® Engine Enamel (DE1651 - Cast Coat Iron). One of my favorite motorcycles ever is Odd Job by Dues Ex Machina. I'm a sucker for the raw aluminum engine with the bright red cylinder. However, for fear of following too closely in their tracks or creating a clown-bike mega-fail, I opted for a subtler contrast between the factory dark gray engine paint and Cast Coat Iron.The engine enamel is a little more metallic than I anticipated, but am confident it will look good when all buttoned up.

A small item I splurged on was a polished stainless steel engine bolt kit. It was fairly inexpensive considering each bolt head was hand polished and allows me to migrate away from hex heads to allen heads. Kinda stoked for all those little baggies.

Friday, March 1, 2013

Financing has arrived

The CRF is SOLD.  I am now free to order parts.  Stay tuned for progress... finally.

Wednesday, January 30, 2013

Sizing Up The Swingarm Options

I like most things about the DR350's design, but one thing I can't get past is the rear swingarm.  It's clunky looking and those fins have not aged well.  I'm sure the three-piece design was cheaper to manufacture than a welded, boxed aluminum design that can be seen on almost every modern dirt bike, but it's also far more flexible with the open C-channels.  Most DR owners agree that the rear swing arm is the DR's biggest weak area.

I have been toying with the idea of swapping it out in favor of something else.  Since I am not too concerned about suspension curves (maybe I should be more so) and I have no issues cutting or adding tabs to the frame to support new linkage mounts, my options are broad.  So broad in fact that I put #2's swingarm side-by-side against one I have from a CRF450.  Granted, the linkage designs are wildly different, but it's eerie to see how similar they are despite their 15 year design gap and different manufacturers.

1991 DR350S swingarm in the background, 2005 CRF450X in the foreground.  The DR swingarm is at least twice the weight of the CRF swingarm.
DR350 swingarm in the background, CRF450X in the foreground.  The pivots are aligned, which helps show the added length of the CRF swingarm.

There are a couple dimensions that really give this wild idea some traction: both swingarms take a 17mm pivot axle, and the CRF swingarm is 5mm narrower at the main pivot than the DR swingarm.  That doesn't mean a swap like this one, or any other, will be remotely easy, but it does mean I won't have to modify the frame-side of the main pivot.  Just say'n...

For the fun of it, I placed my components in their places.  That's #2's frame, the DT250/400 tank, #2's forks (lowered 3.5"), an 18" CRF rear rim floating in the front, a CRF swing arm, and #2's rear 18" rear wheel.  Mentally photoshop some tires and a different, more road-race-esque rear section, and we are in business.

Sunday, January 27, 2013

Tiny War Tank

I had a CL score [impulse buy] this weekend.  I picked up a tank, fender, and seat for $100.  The tank was primered and seemed to be repaired based on the magnet test.  When I got it home and sanded it, it became more ugly-duckling and less beautiful-swan.  It doesn't have any major dents, but it does have a few minor ones that need to be addressed.  I will probably make it work.  It would be a good candidate for the rusted look.


The seller didn't know what it came off since he bought someone else's street tracker project for parts.  I'm guessing a late 70s Yamaha DT250 or DT400.

 The purchase came with a fiberglass fender and seat.  The whole reason I pursued this was for the seat, but after seeing that it has a constant curve in the sea pan profile, I might not use it.


This is the shape I am after.  Flat for the first 80%, then an upsweep for the last 20%.  I guess I could make a new seat pan with the shape I want, then steal the cover and foam from this one.  That's a pretty dirt-bag option, but it would be cheap and easy.